
Hello — it has been a while.
I was wondering what to write and landed on a tip for tagging pipe BOP.
Looking at tag families, duct can show BOD (bottom of duct level) with a label. Pipe does not get the same support in Revit (2016). Does 2017 support it?
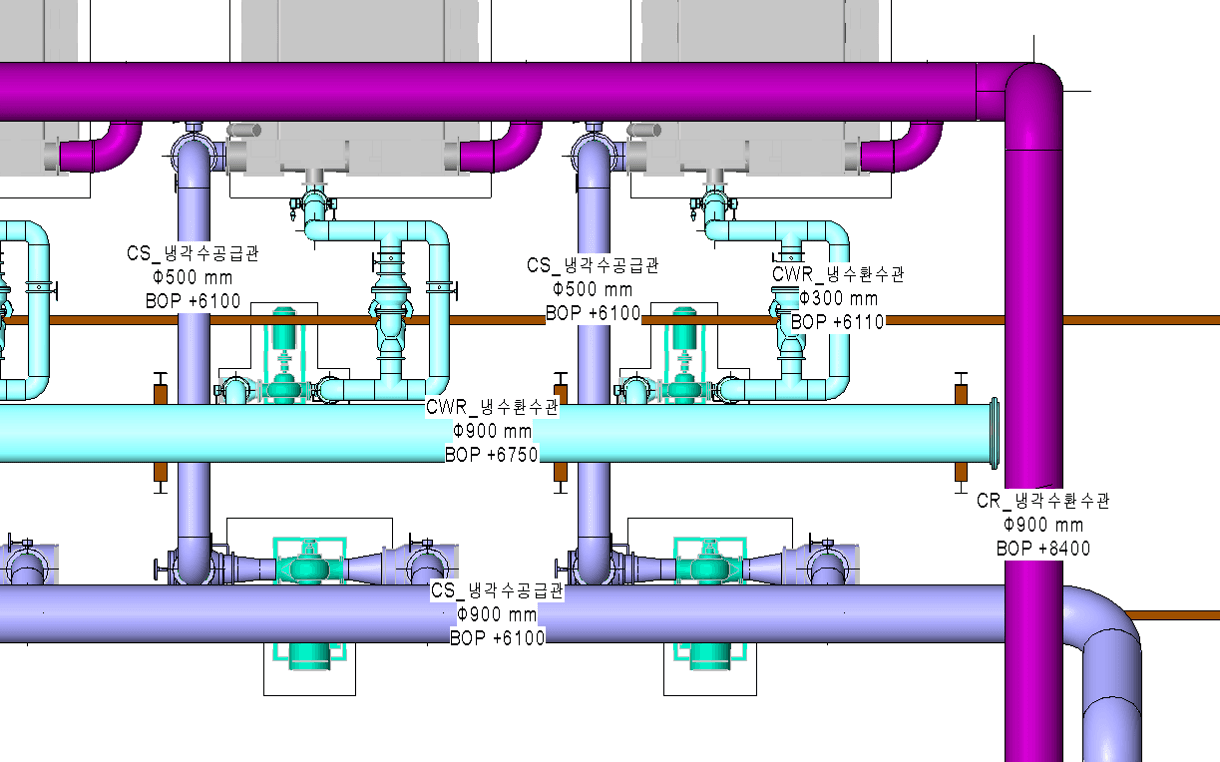
Anyway, I want an easy way to show pipe BOP too. This is the look I want.
I think a lot of BIM MEP people will relate. After some searching, the common answers were a paid plugin or Spot Elevation. I do not want to spend the money, and Spot Elevation is not a pipe tag, so it will not tag in the format I want. So I am going to tag pipe BOP with Dynamo and shared parameters, both of which Revit already supports. (This is a tip for people already in the work. It may be hard if you are just starting.)
If you look at a pipe segment in Revit, you will see Nominal, ID, and OD — roughly nominal size, inside diameter, and outside diameter. Draw a 200 pipe and the model uses ID 193.675 and OD 219.075. Sometimes people adjust the segment so both ID and OD are 200. I usually work to real size.
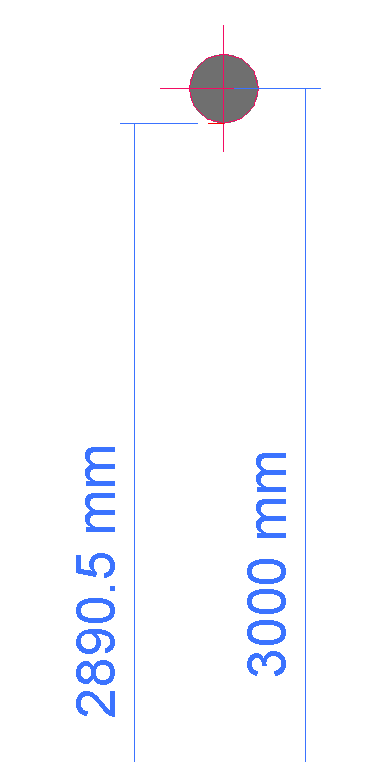
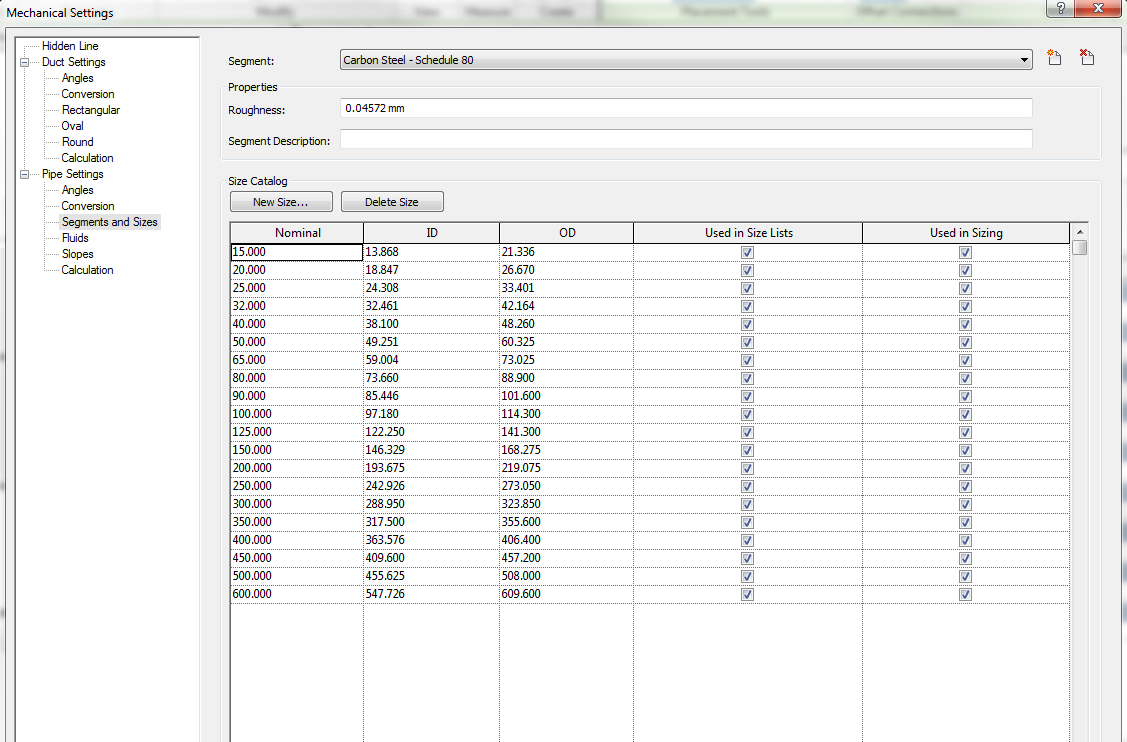 This is where BOP goes wrong. Draw a 200 pipe at height 3000 and BOP comes out as 2890.5. Every time the pipe segment changes, BOP changes. That gets confusing. In 2D we used to show BOP as 2900: offset minus nominal/2. So I want to use a real-size pipe segment, but show BOP as offset minus nominal/2.
The method I used is this.
[in Dynamo]
-
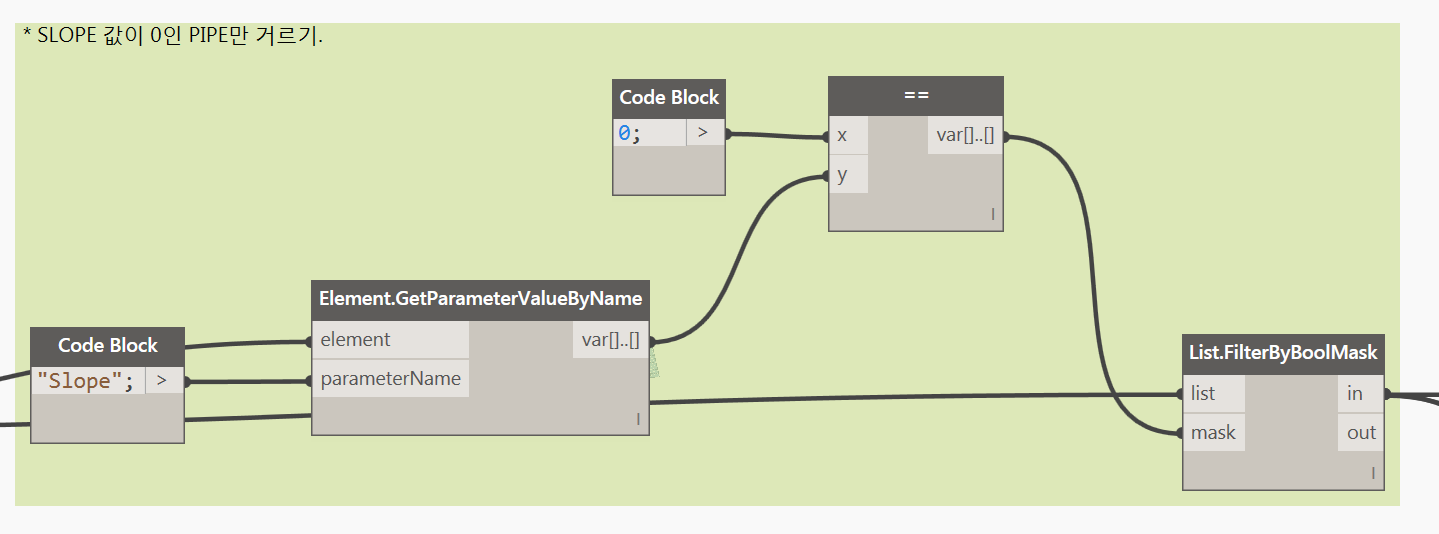
Extract the pipe SLOPE value.
-
Keep only pipes whose SLOPE is 1:0.00. (This filters out sloped and vertical pipes.)
-
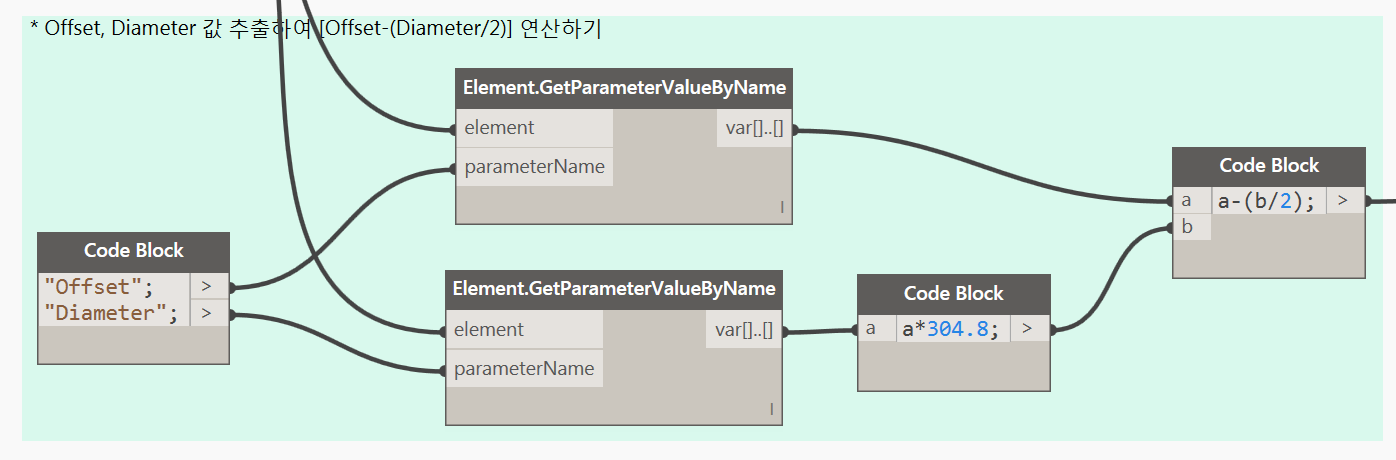
Extract the pipe Offset and Diameter.
-
Calculate Offset - (Diameter/2).
-
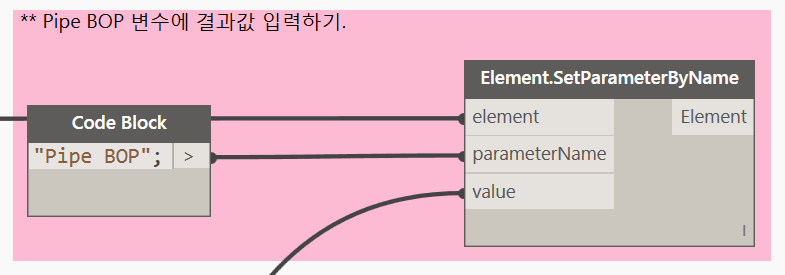
Write the result into a shared parameter called PIPE BOP.
[in Revit]
-
Before running Dynamo, create the PIPE BOP shared parameter.
-
Run Dynamo and fill PIPE BOP.
-
Make a pipe tag family.
-
Tag.
A lot of people do not know Dynamo well. Think of it as an add-in that lets people who do not write code push Revit further, in a more visual way. It is hard to explain cleanly. From 2017, Dynamo is included with Revit. If you are interested, there are free lessons at the link below.
Shared parameters can be used across families and projects. A normal parameter lives only inside a family, so you cannot pull the information out. With a shared parameter, a tag family can read a value that sits on the pipe.
Let's do it. (This is Revit 2016, English version.)
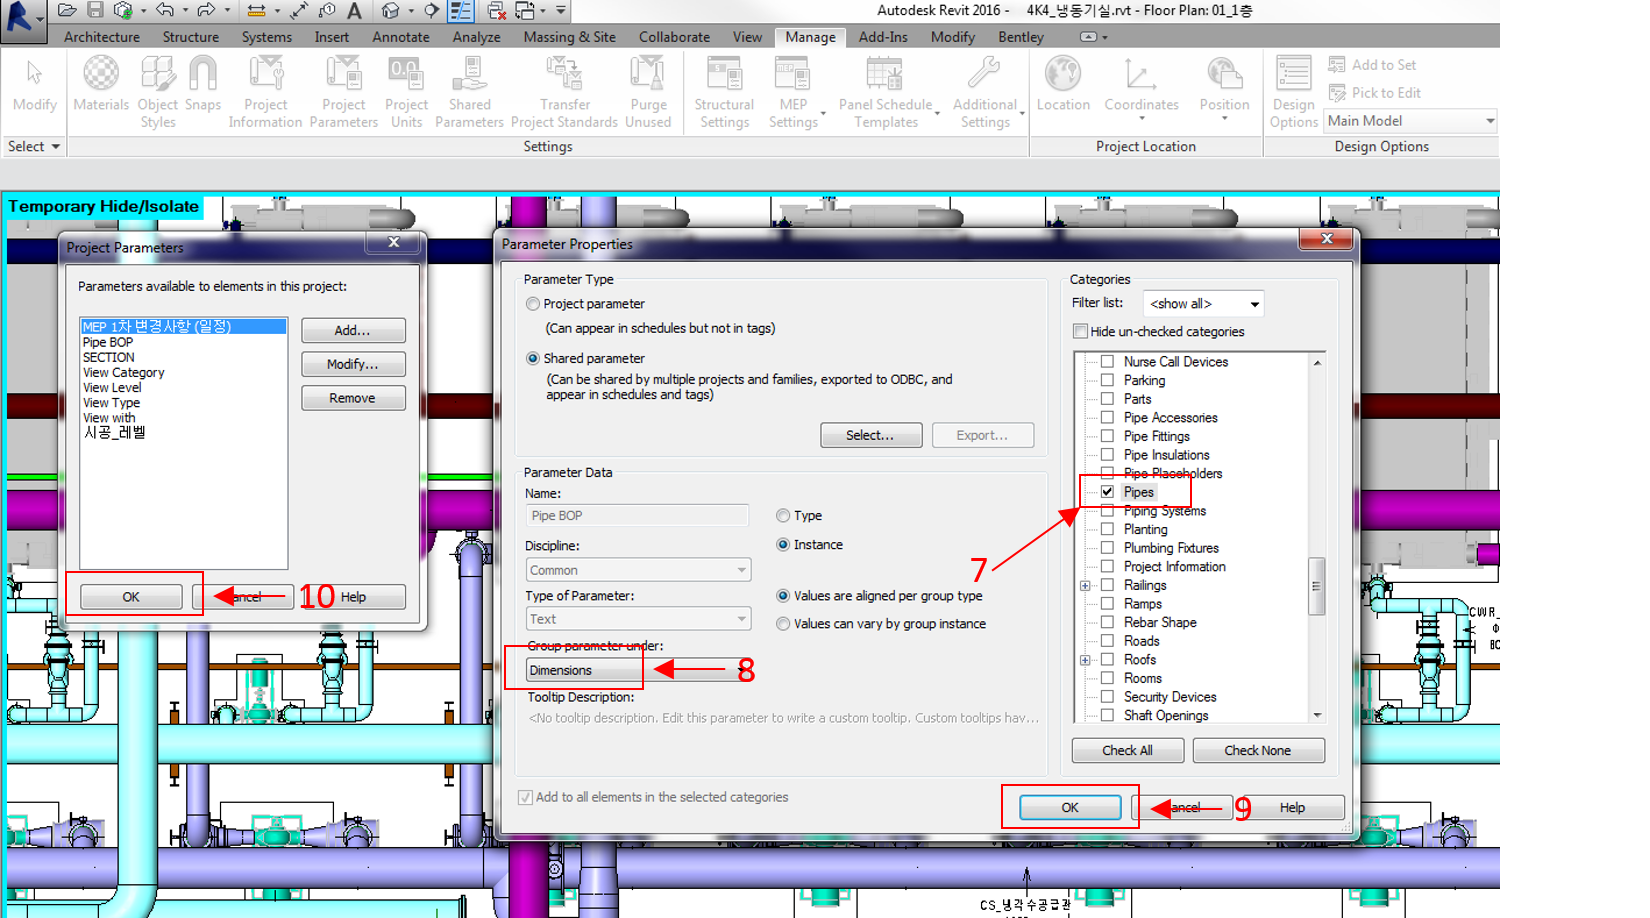
#1 Create a shared parameter in Revit
Click and set the items in the order shown in the images.
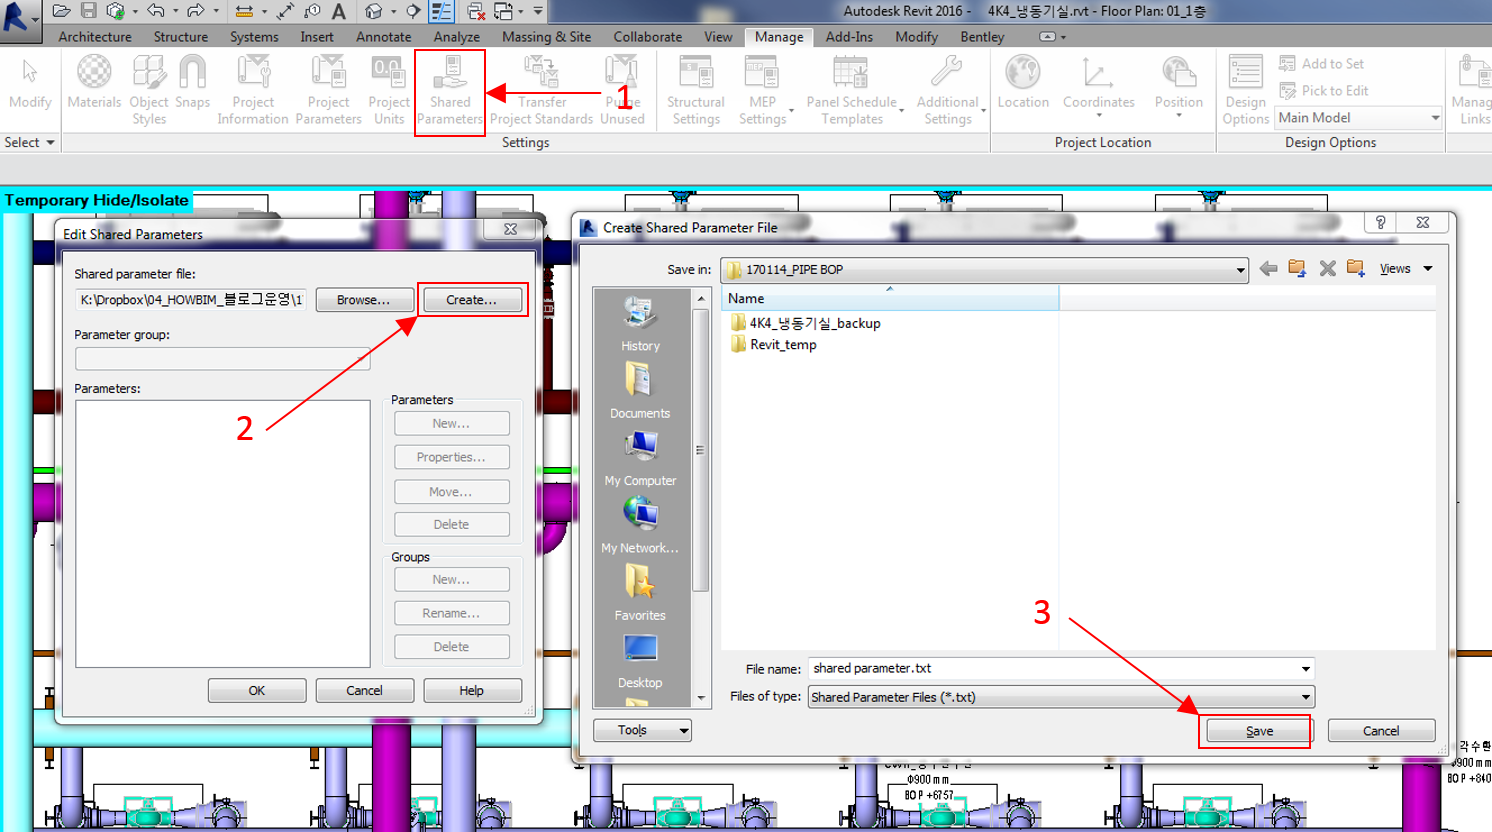
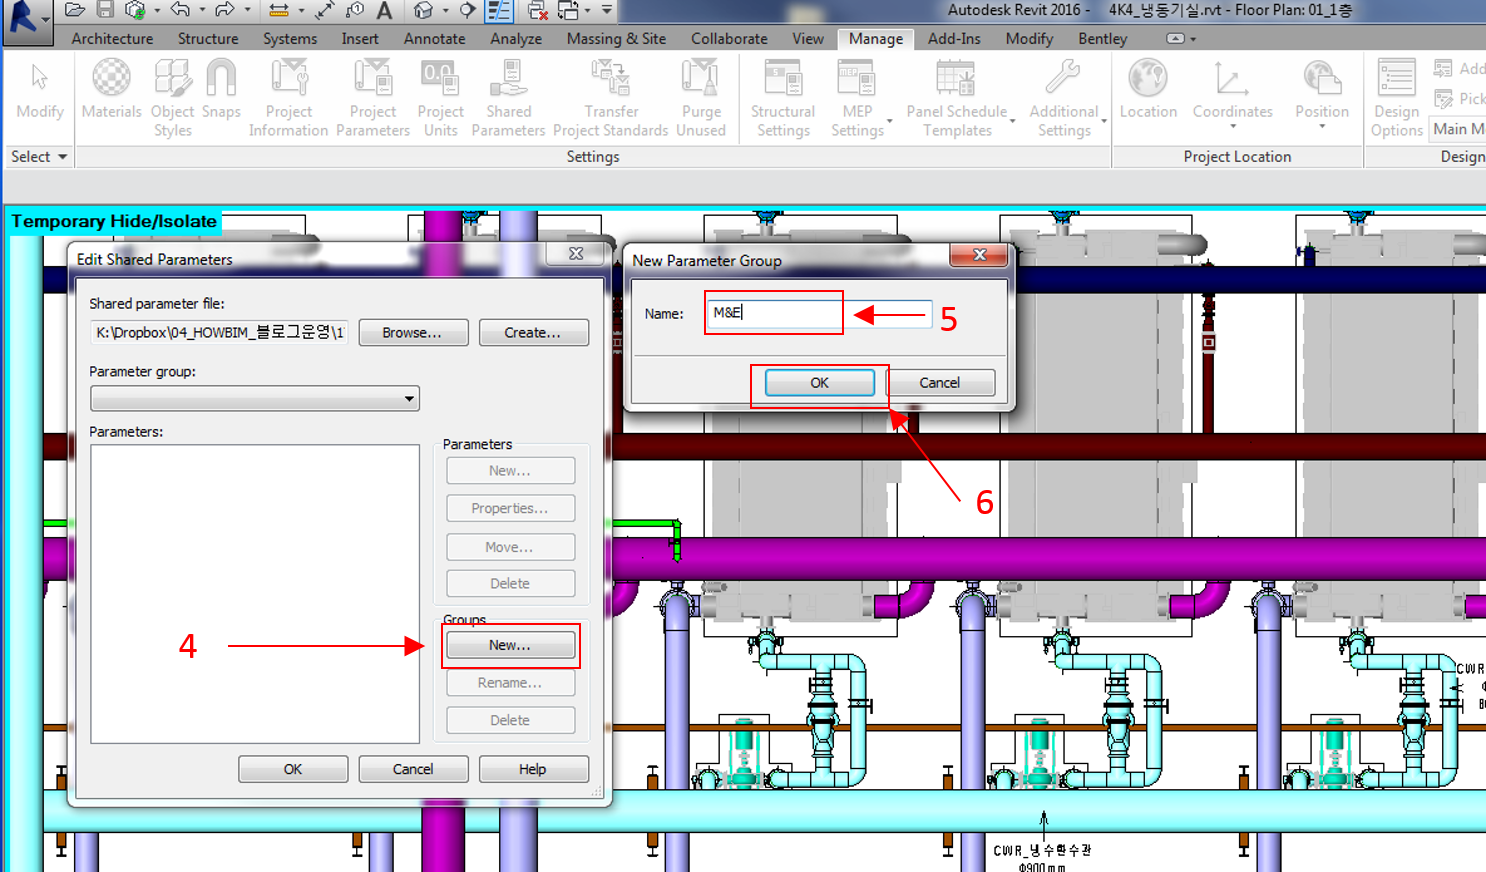
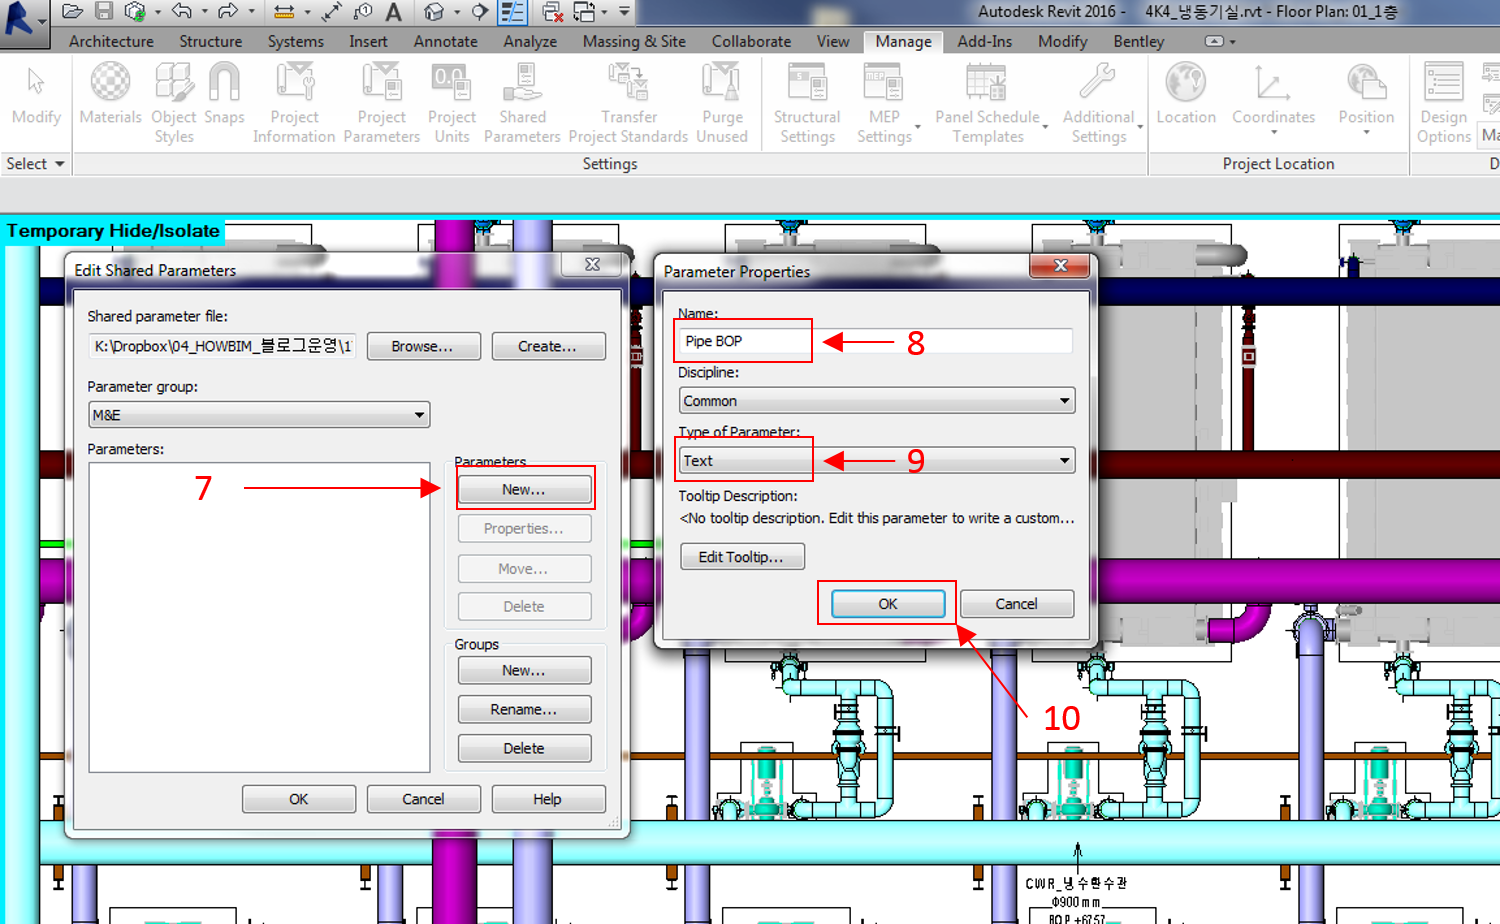
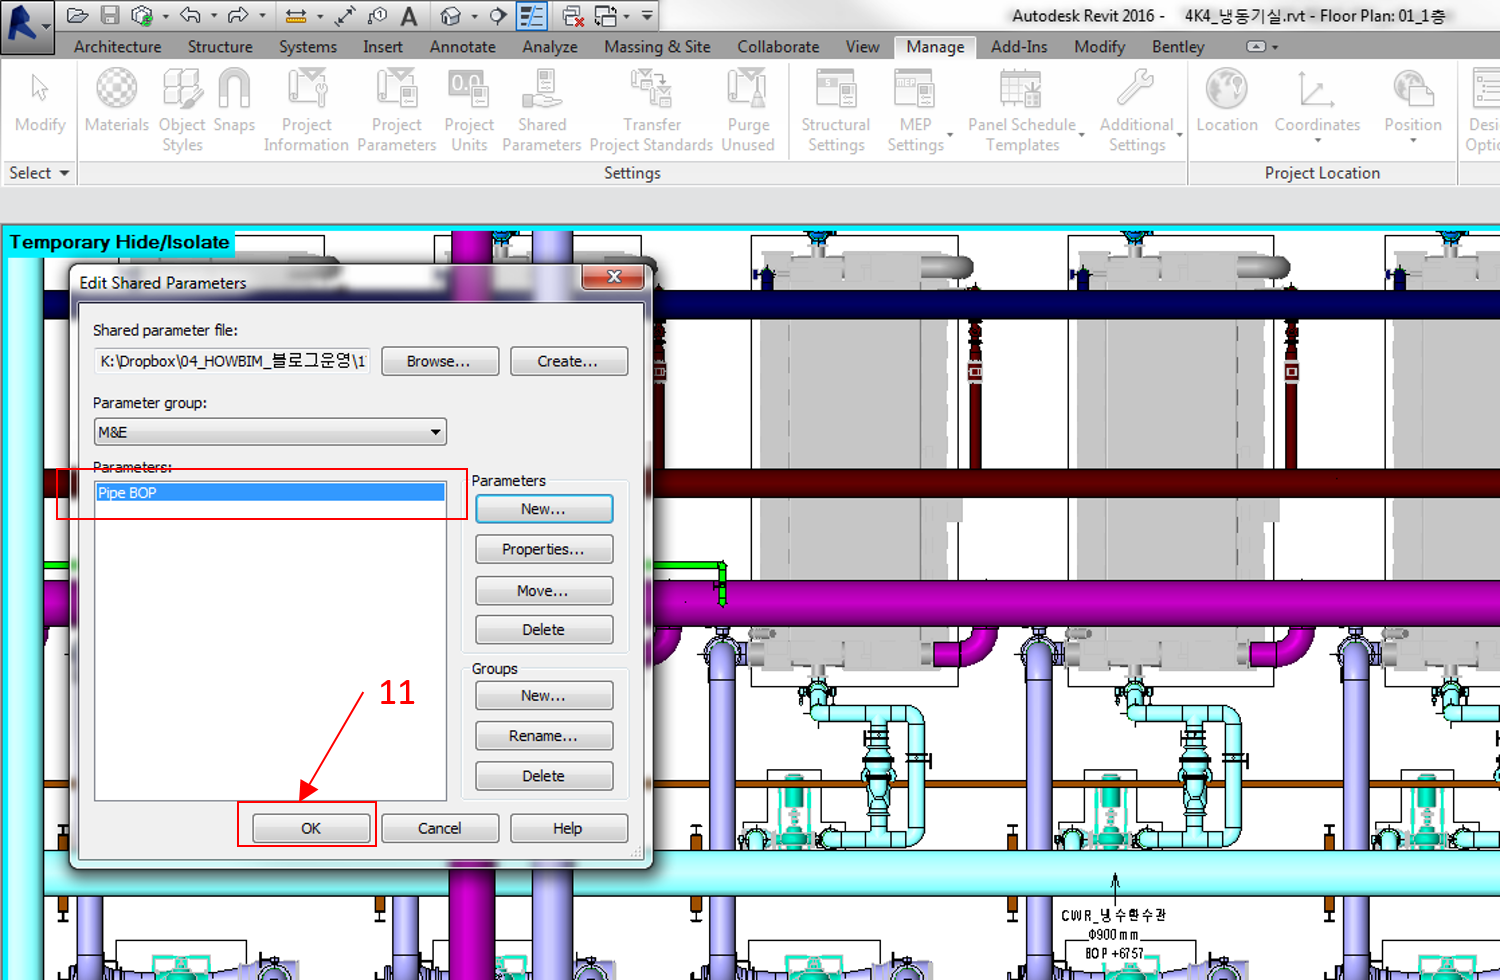 At step 9 I set the type to TEXT. If you use a number, trailing decimals like .0000 appear, and I could not get rid of them. I only need to display the value, so TEXT is enough.
#2 Add it as a project parameter
Click and set the items in the order shown.
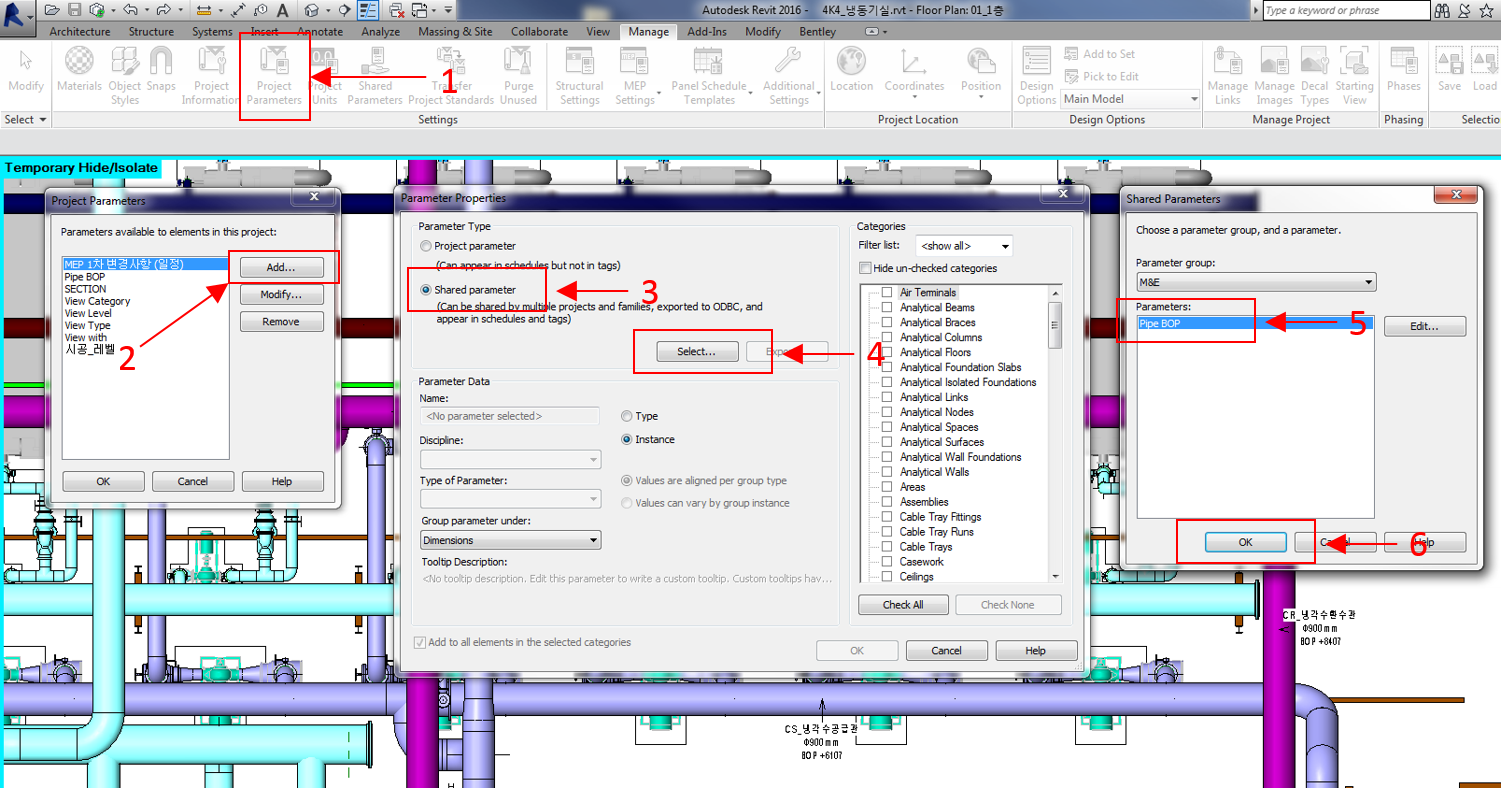
A shared parameter called Pipe BOP now exists on pipes.
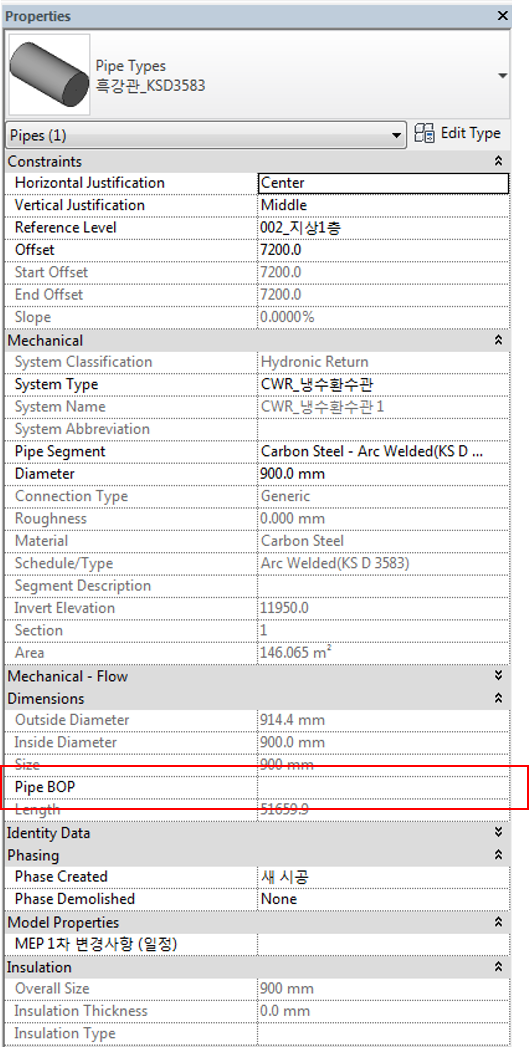
#3 Run Dynamo
First download the file I made.
Run Dynamo from the Revit Add-Ins tab.
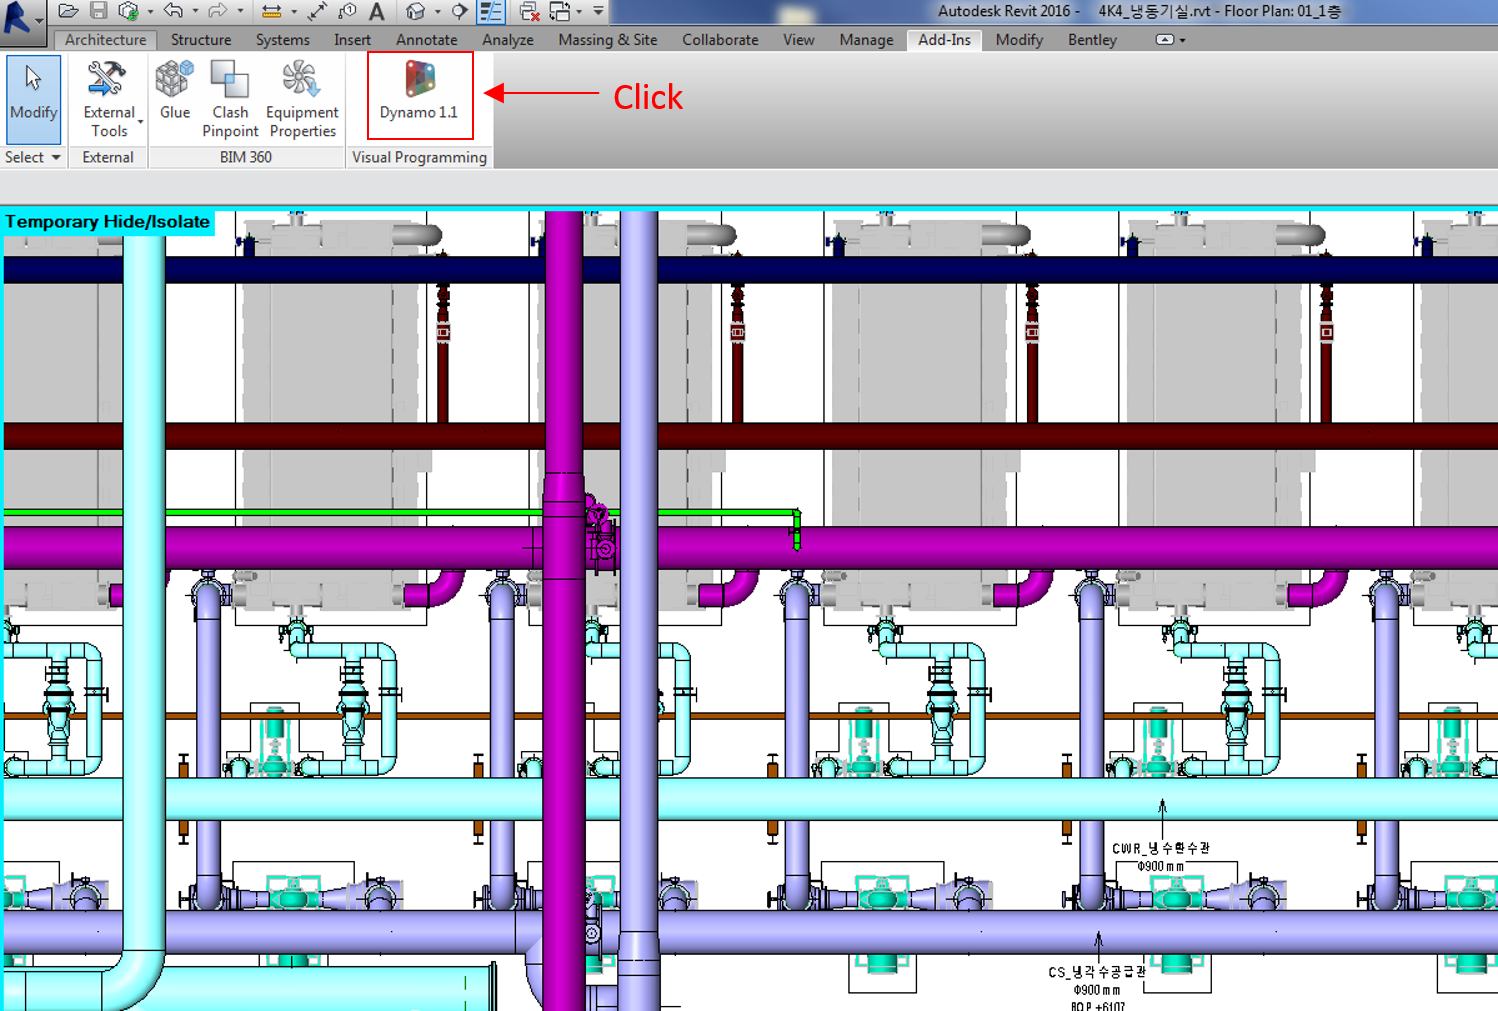 If you do not have Dynamo, install it. Use the download on the left side of the site.
https://dynamobim.org/download/
 Open the downloaded file in Dynamo.
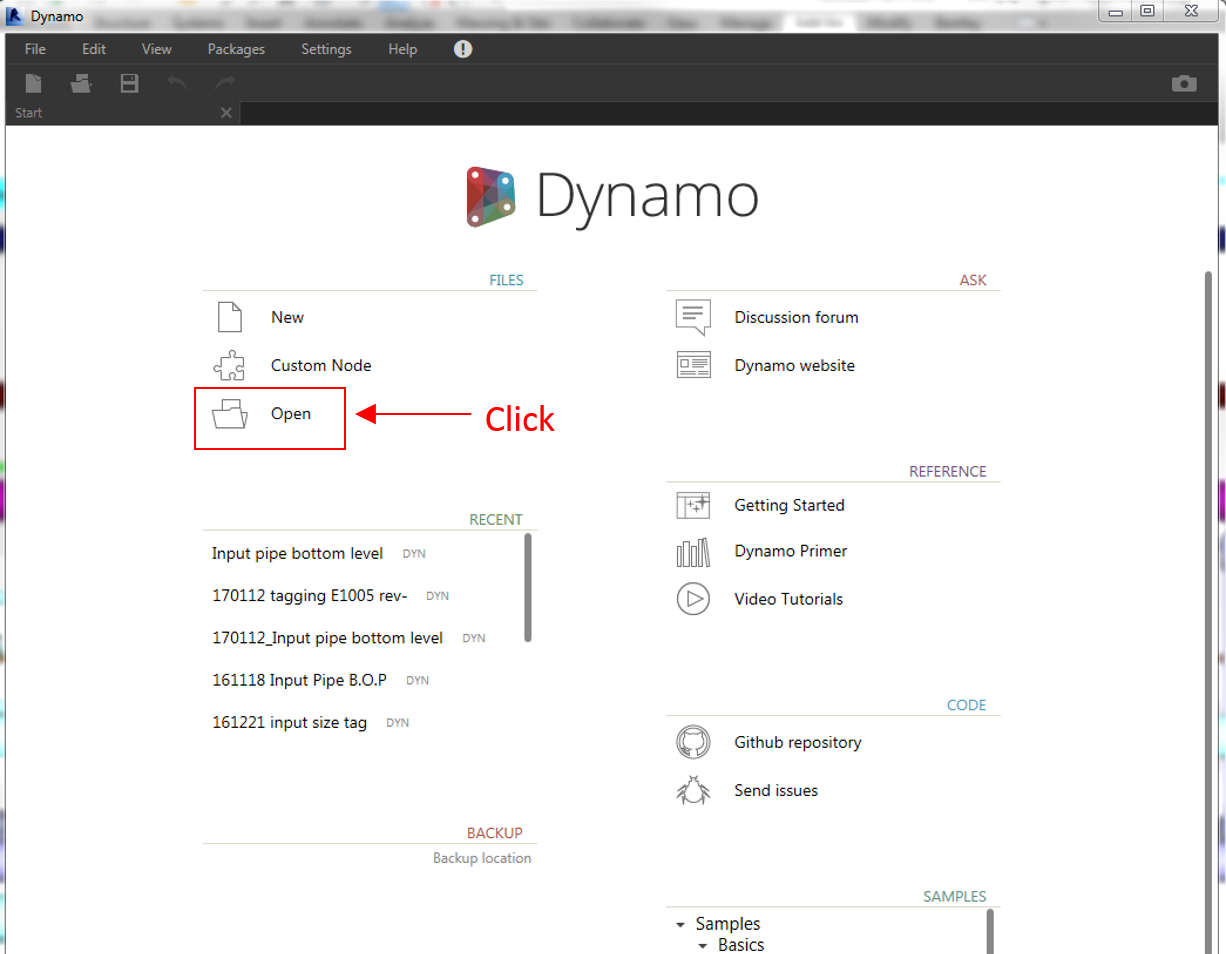 You should see something like this.
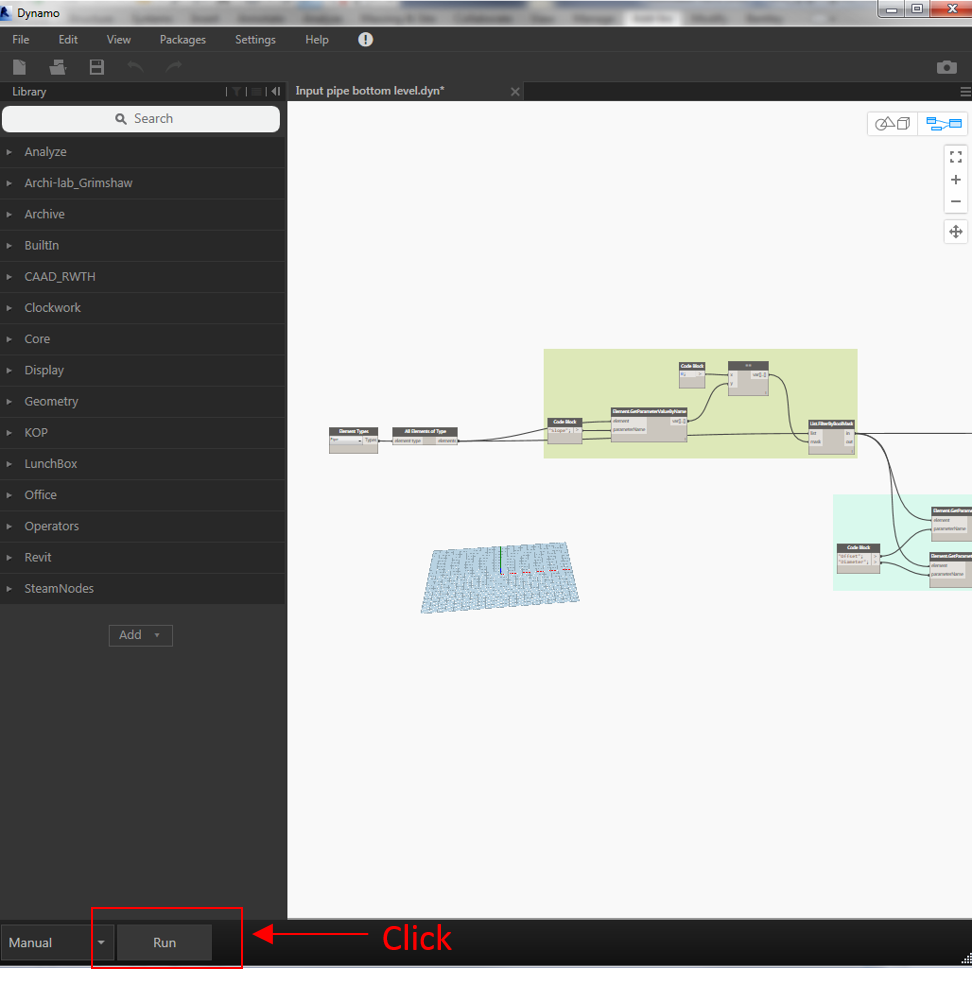
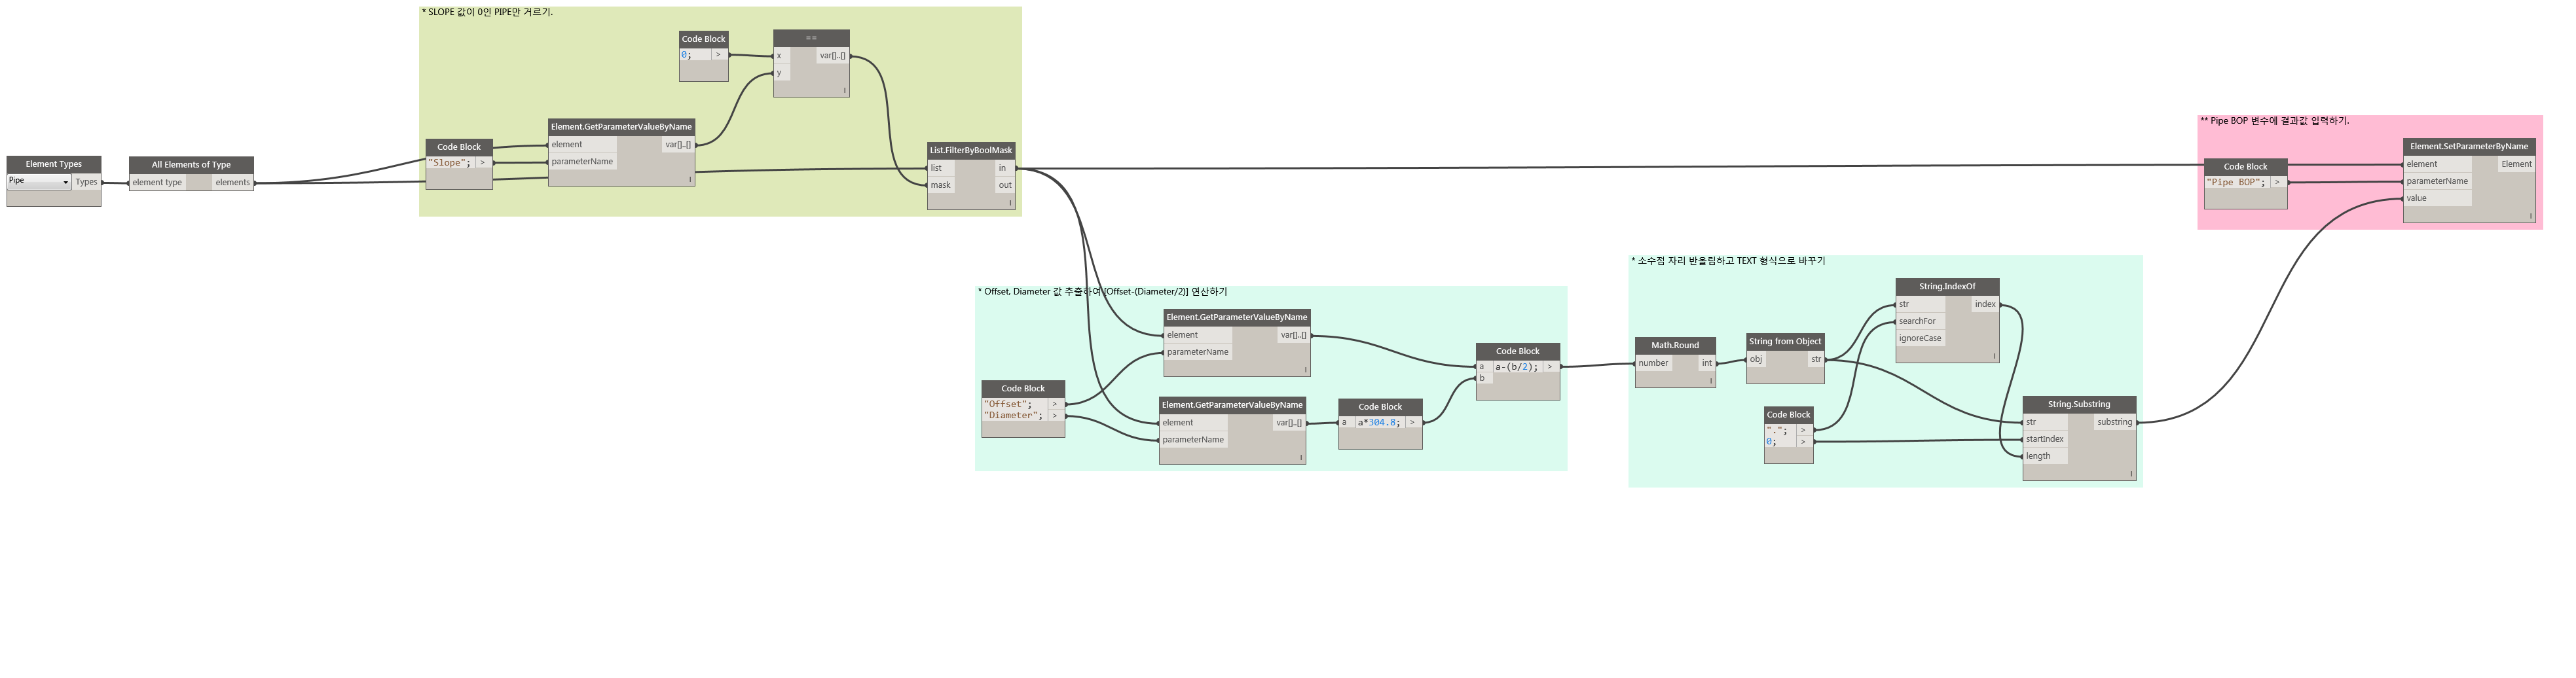 Press RUN in Dynamo and the Pipe BOP values will be written.
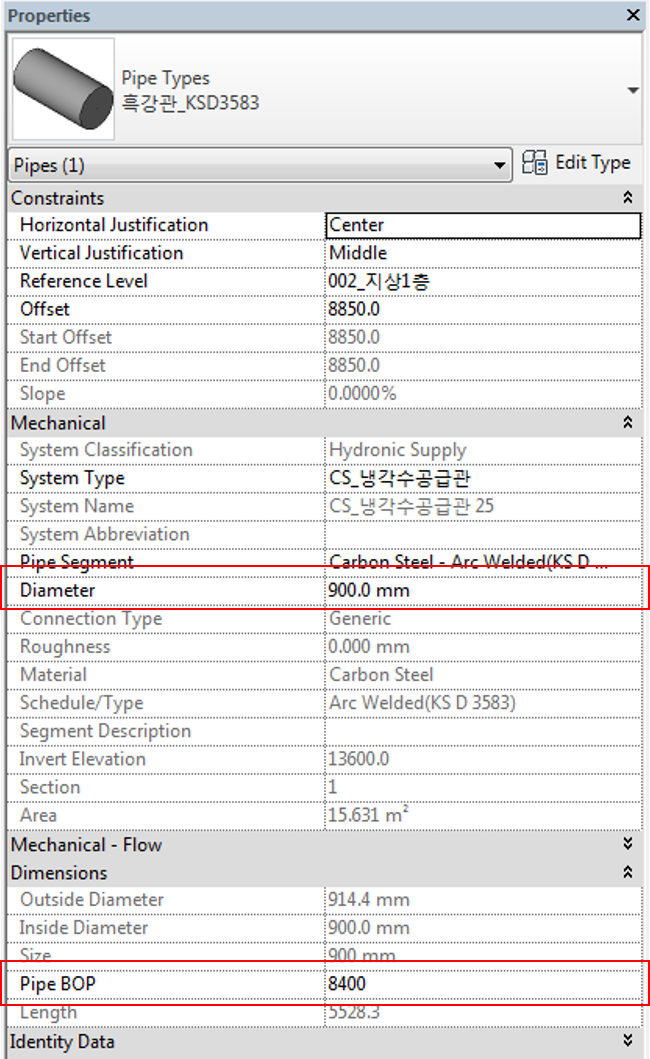
 After it finishes, click a pipe and you will see Pipe BOP filled in.
Dynamo makes this kind of work much easier.
A short version of the graph:
First it filters every pipe in the project down to those with Slope 0. That is how sloped and vertical pipes are excluded.
 For those pipes it reads Offset and Diameter and calculates [Offset-(Diameter/2)].
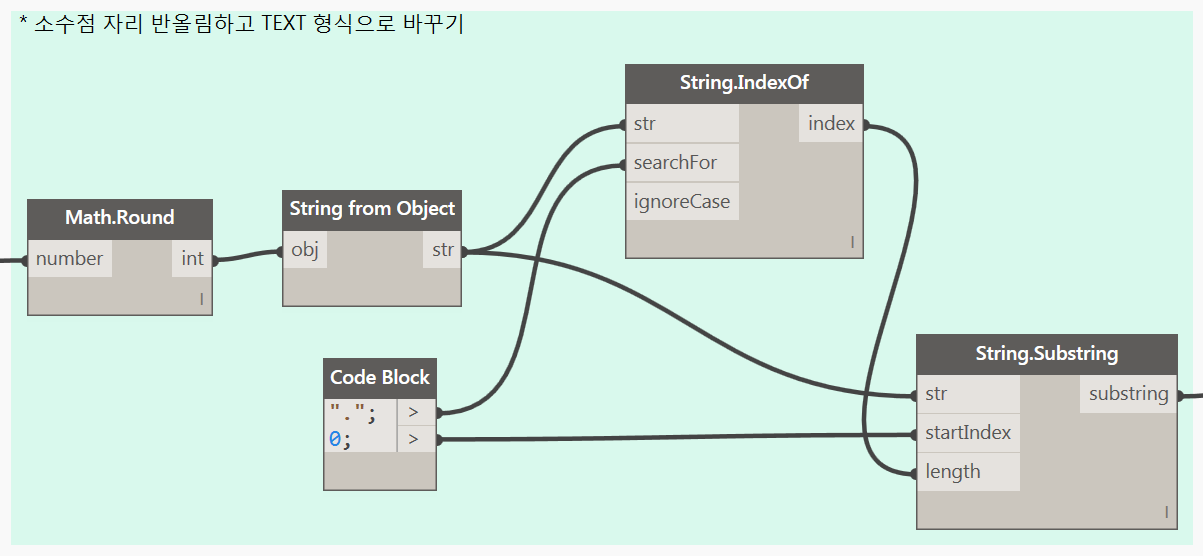
 If you write that value as-is, decimals appear, so it rounds and converts the type to TEXT.
 Then it writes the result into the Pipe BOP shared parameter.
 If you get comfortable with Dynamo, you can use Revit about 200 times more.
#4 Pipe tag family
Download the pipe tag family below.
Insert the tag family in Revit.
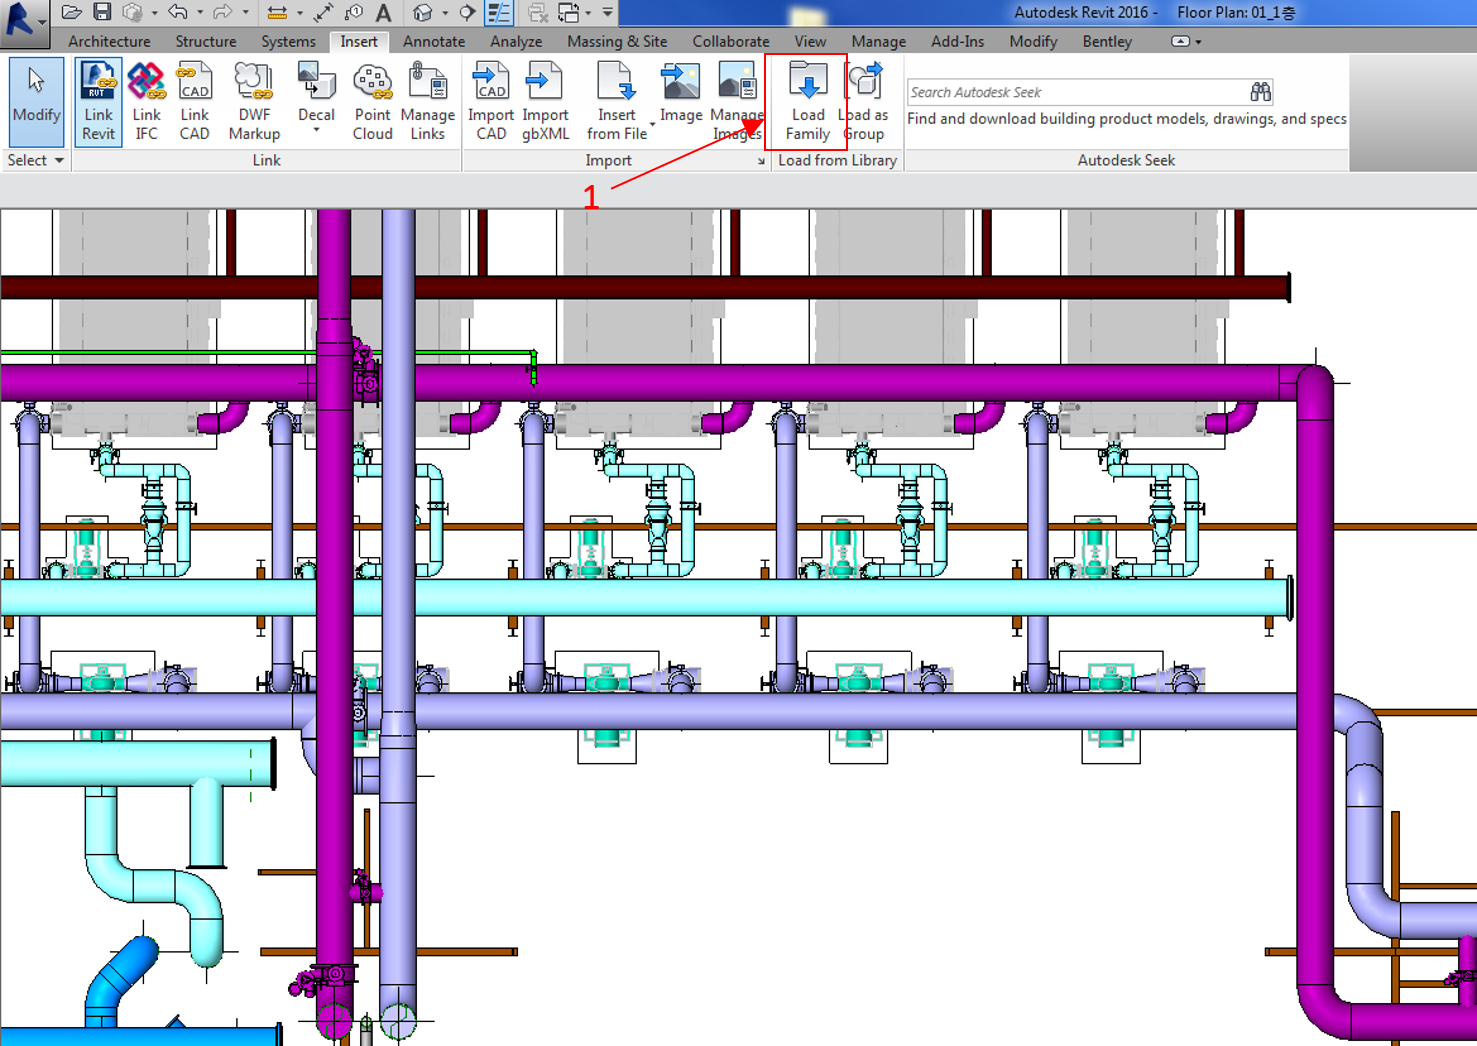
Use Tag by Category on the Annotate tab.
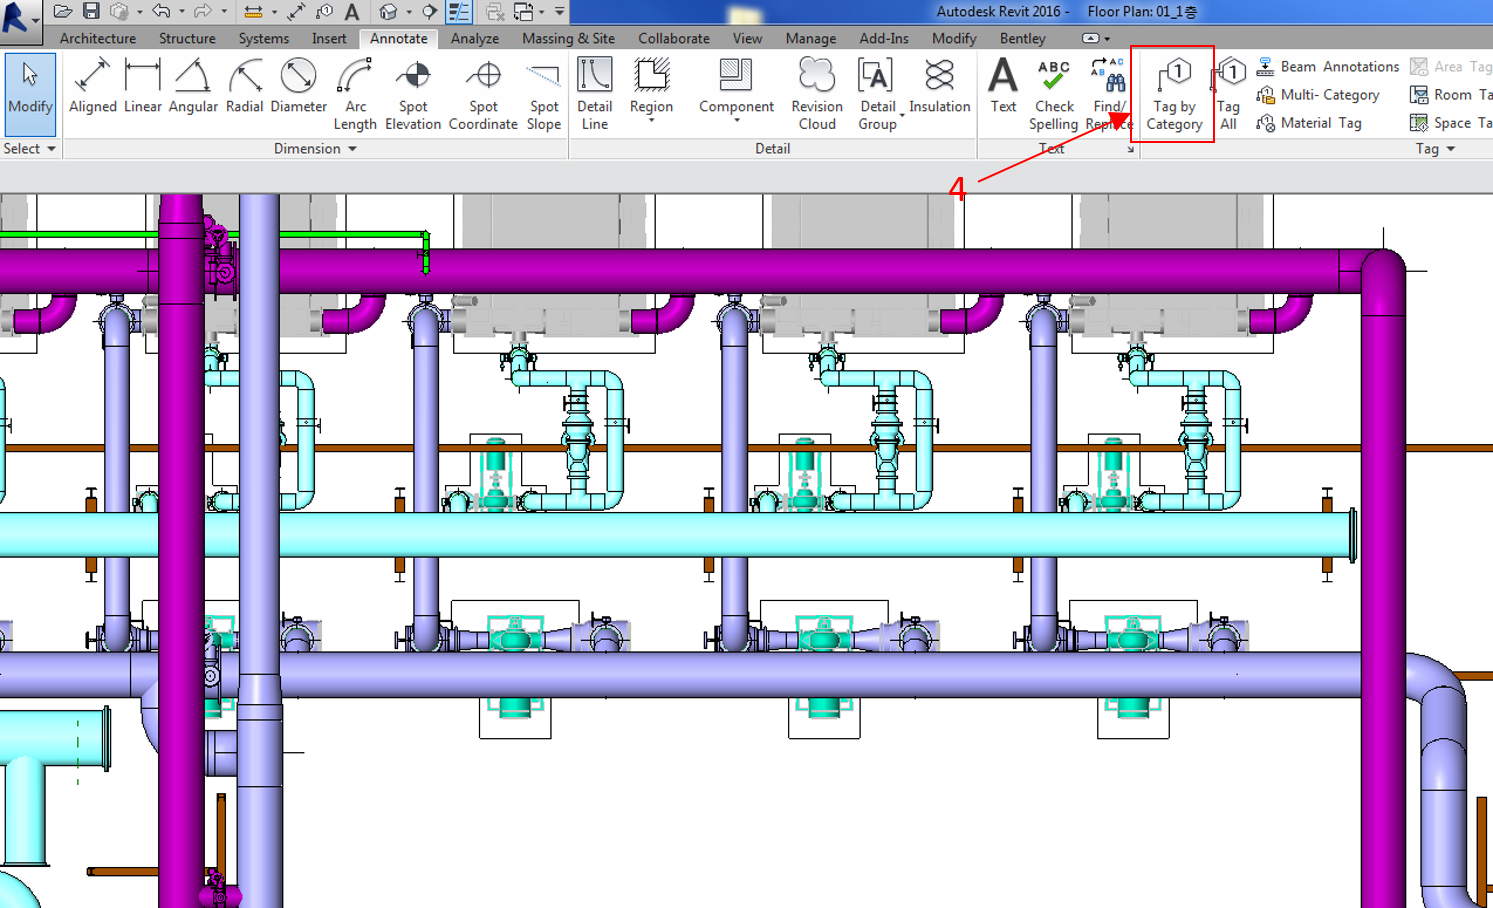
The tags now look like this.
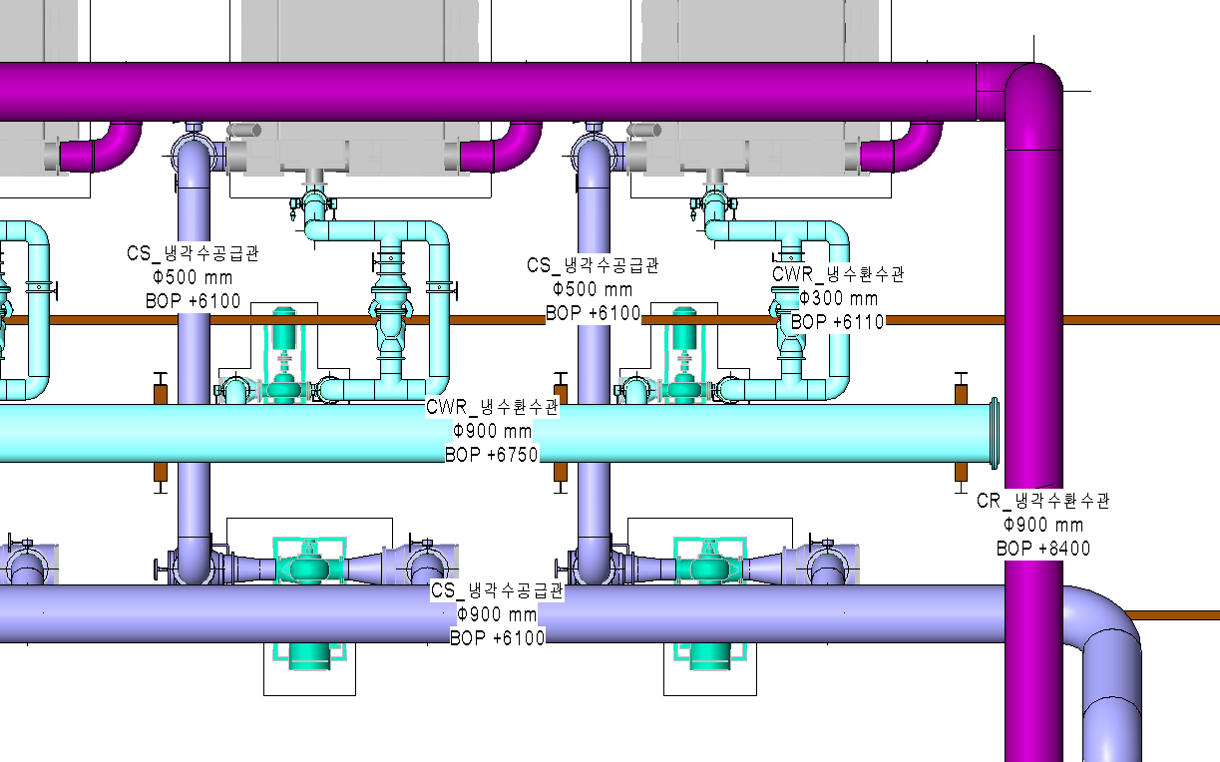
That is an easy way to pull BOP.
A short note on the pipe tag family:
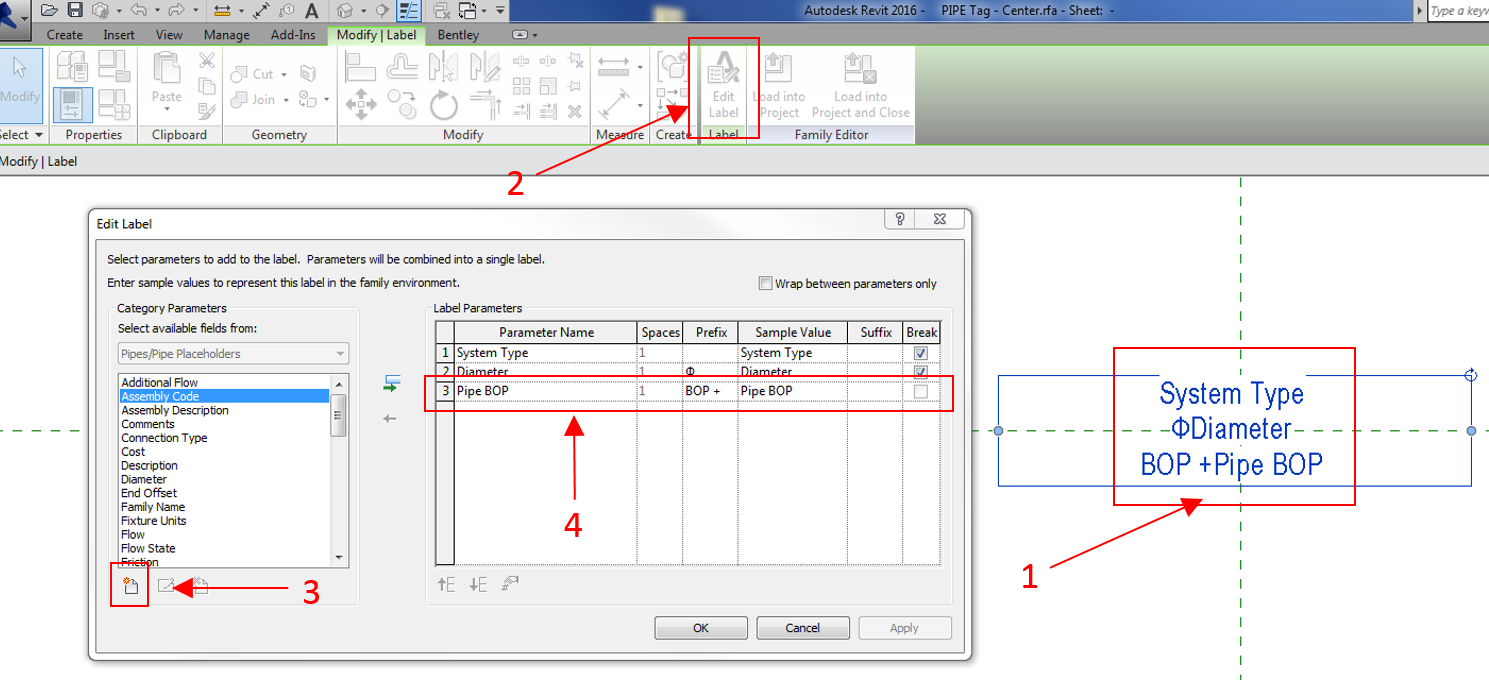
Open the tag family.
1 is a Label.
2 opens the edit window, with the supported values on the left.
3 lets you add a shared parameter.
That is how the Pipe BOP parameter we made becomes visible.
You can adapt this to tag many other values you want.
If you've got more questions, email me or leave a comment and I'll answer as best I can. Have a good one today!
#BIM, #HOWBIM, #MEP, #REVIT, #Revit, #pipe tagging, #Dynamo, #PIPE BOP